Microsoft Treasure Hunt Strategy Guide
- Introduction and General Strategies
- General Patterns
- Row Patterns
- Corner Patterns
- Specific Patterns
- Subtraction
- Chording
- Analysis
- Level 86 Walk Through
Level 86 Walk Through
Level 86 immediately follows a visit to the Greedy Mummy Shop, and I assume that the player will have maxed out on pickaxe belts, dynamite bags and map pouches. Nevertheless, the thirty pickaxes, dynamite bundles and maps will have to last 5 levels before the next shop, so we will limit ourselves to using no more than 6 of each, or fewer if we can. I typically do not buy shields.
It is possible that the Level 86 that you see will be different from this one. Consider it an example, not a solution map.
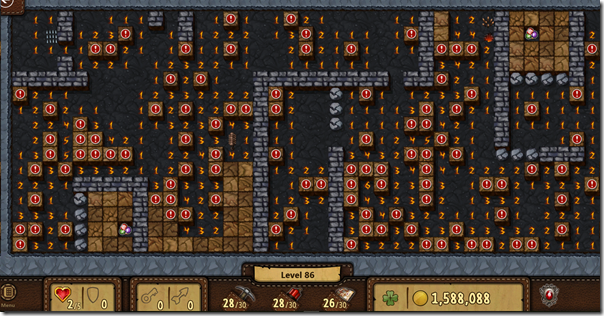
The level has two doors and two monsters to pass, and the locations of the arrows and keys are not shown.
After you pick up the gems, Level 86 starts with this small exposed space:
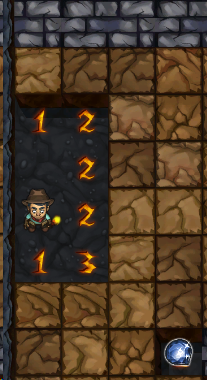
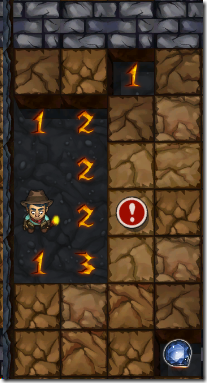
A trial and error approach on paper gives little information. The space above and to the right of the 3 is a trap, and the space above and to the right of the uppermost 2 is safe. Beyond that, logic tells us nothing more. It’s time to use a map. A number of places could be used for the map, but I like the space to the left of the trap.
Below is the area revealed:
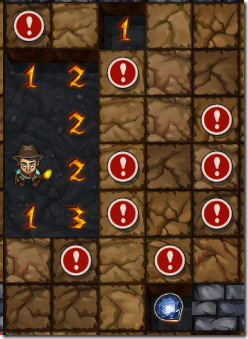
Chording is a convenient way to clear the area, and after chording and moving around to auto-clear areas with no traps adjacent, quite a large area becomes visible:
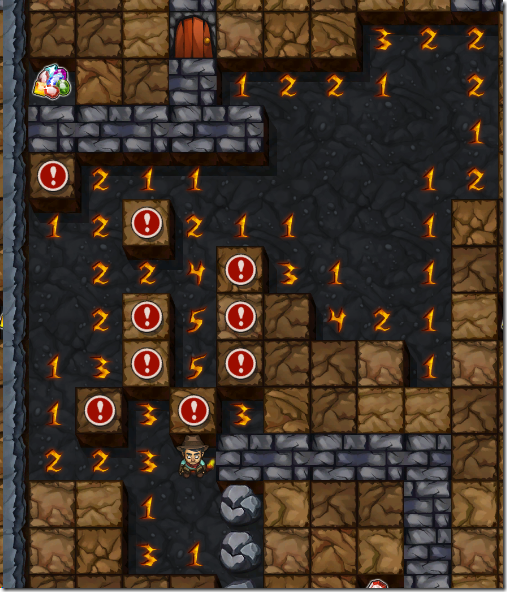
At this point, we can apply trap counting for 1, 2 and 4 from the Strategy Guide to flag some more traps:
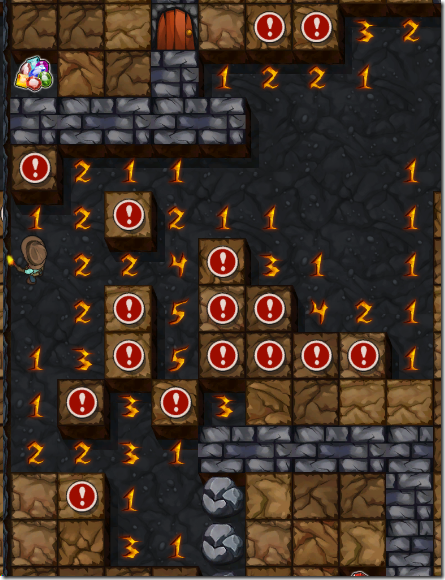
Then cording again opens up more space, and reveals the first key. Here’s what it looks like when that is done, and some 3-count traps are counted. Note: while I believe that the layout of traps and walls is consistent every time you play each level, the actual treasures found are not. You might find a different treasure in a particular spot the next time you visit a level. There might not, for example, be a heart in the location shown when you play Level 86.
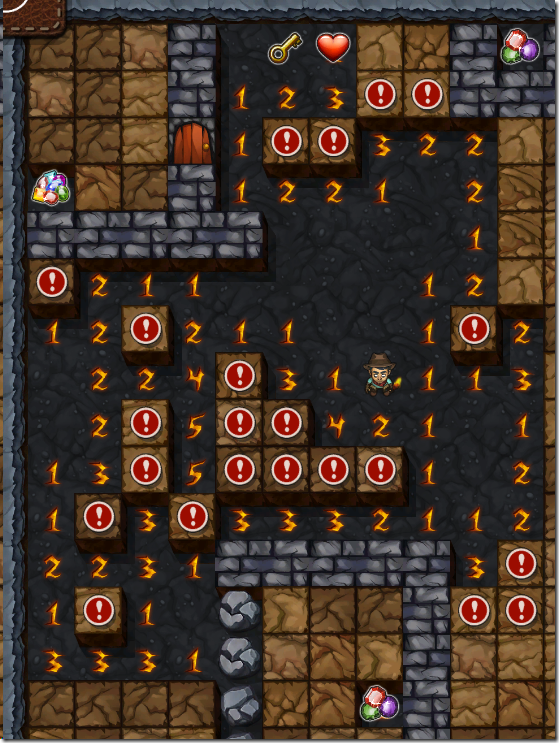
The puzzle in the lower left is solved by using the Subtraction rule to reduce 3-3-3-1 to 2-2-2-1, recalling that when the pattern against a wall starts 2-2, both are traps. You can clear that entire area, but there’s nothing of value.
Now’s a good time to grab the key, and open the first door. When opened, it is revealed that one of the three squares inside the door is a trap. There are several approaches to dealing with the trap. We could use a life and then get it back with the heart. We could use a pickaxe. We could use a map. We could use dynamite. I prefer not to use lives this early in the level because sometimes I make mistakes and lose some of them. One could just walk away and not explore the area, but it probably contains an arrow or a key. A map is wasteful for this small area, so I’ll choose a pickaxe, realizing that I may need two of them. In this case one pickaxe is enough, and we indeed find an arrow. Run over the heart and then one space to the left to reveal that there is a 1 under the heart, allowing us to chord that space and clear the area and reveal a dynamite bundle, a treasure we cannot pick up yet because our dynamite bag is full.
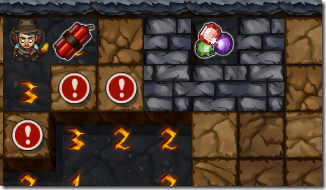 Normally the gems in the enclosed area are not worth the cost of the dynamite bundle it takes to free it; however, in this instance the dynamite may allow us to expose enough spaces to move forward, giving the gem as a bonus (which probably shouldn’t be picked up until we know whether will find a bonus level that will double the treasure value found afterwards).
The next area to look at is center right of the exposed area so far. Trial and error completely resolves the first column of that area with traps indicated by a “T” in the illustration following.
Exposing those traps and chording advances one column to the right revealing more area that can be worked, and the traps indicated found. Also the second key is revealed.
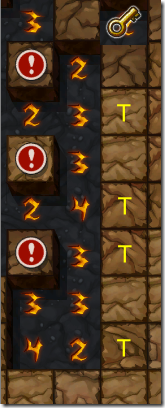
Using basic rules yields this area of the map exposed:
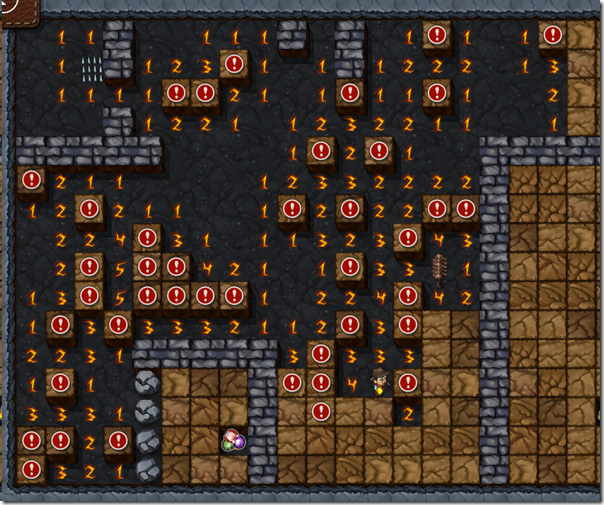
Unless we have spare lives at the end of the level, I would not explore the area towards the bottom because the cost of the resources to expose it is likely not worth the treasure found. I think a resource goes for about 5100 gold in the next Greedy Mummy Shop and no treasure is worth that much. So the next step is to use a map to advance in the area upper right and to reach the next door. One map is sufficient to reach the doorway and reveal some empty squares:
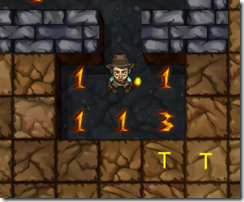
We can work out the location of two traps, and the three squares in the same row and to the left of the traps are open. This is enough to get to and past the first monster, and our task is simplified because we had exposed the top two rows of this area with the map previously. The treasure in this area is a shield. The entire area can be cleared with little difficulty.
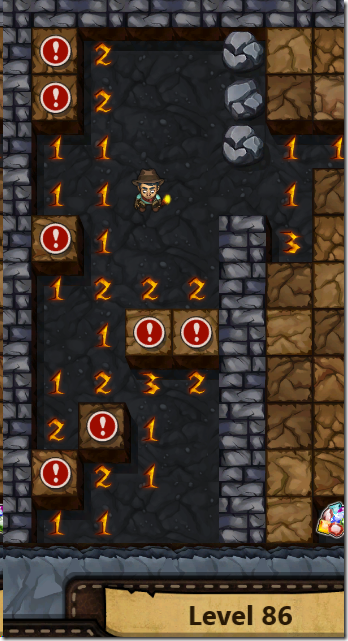
The area to the right can be partially cleared, but a map is necessary to make much progress. Using the map allows a fairly simple clearing of the area the bottom. At this point there are two approaches. One can continue to the right and head for the exit, or move up to approach the monster, which may well be guarding the bonus level. Given the few resources used so far, I think it’s worth seeking the bonus level and it turns out not to be too difficult. Clearing the path to the monster required one additional pickaxe. OOPS, I forgot one small detail—I don’t have an arrow. I suppose the elegant solution is to go find one, but dynamite works just as well, and indeed the monster does guard a bonus level—woo hoo!
At this point, our budget allows us 4 pickaxes, 5 dynamite bundles and 3 maps. The task now is to clear a path to the exit using as little in the way of resources that we can, and then use the spare lives and the one shield we picked up to gather some more treasure.
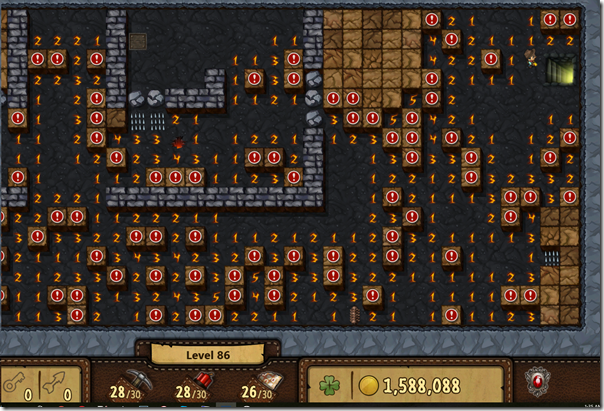
A funny thing happened on the way to the exit. I made a mistake and lost my shield. I got stuck reaching the exit and had to use dynamite (a pickaxe or a map would have also worked to finish). Out of 30 of each resource, I ended up with 28 pickaxes, 28 dynamite bundles and 26 maps left. I also have 5 lives. At this point I’ll use 3 of my remaining lives to gather treasure (I like to keep some spares just in case of mistakes) and then show you the resulting map (click to enlarge).
