
The radio arrived today, a day early, from AliExpress. The box didn’t look too good, but the contents were fine.
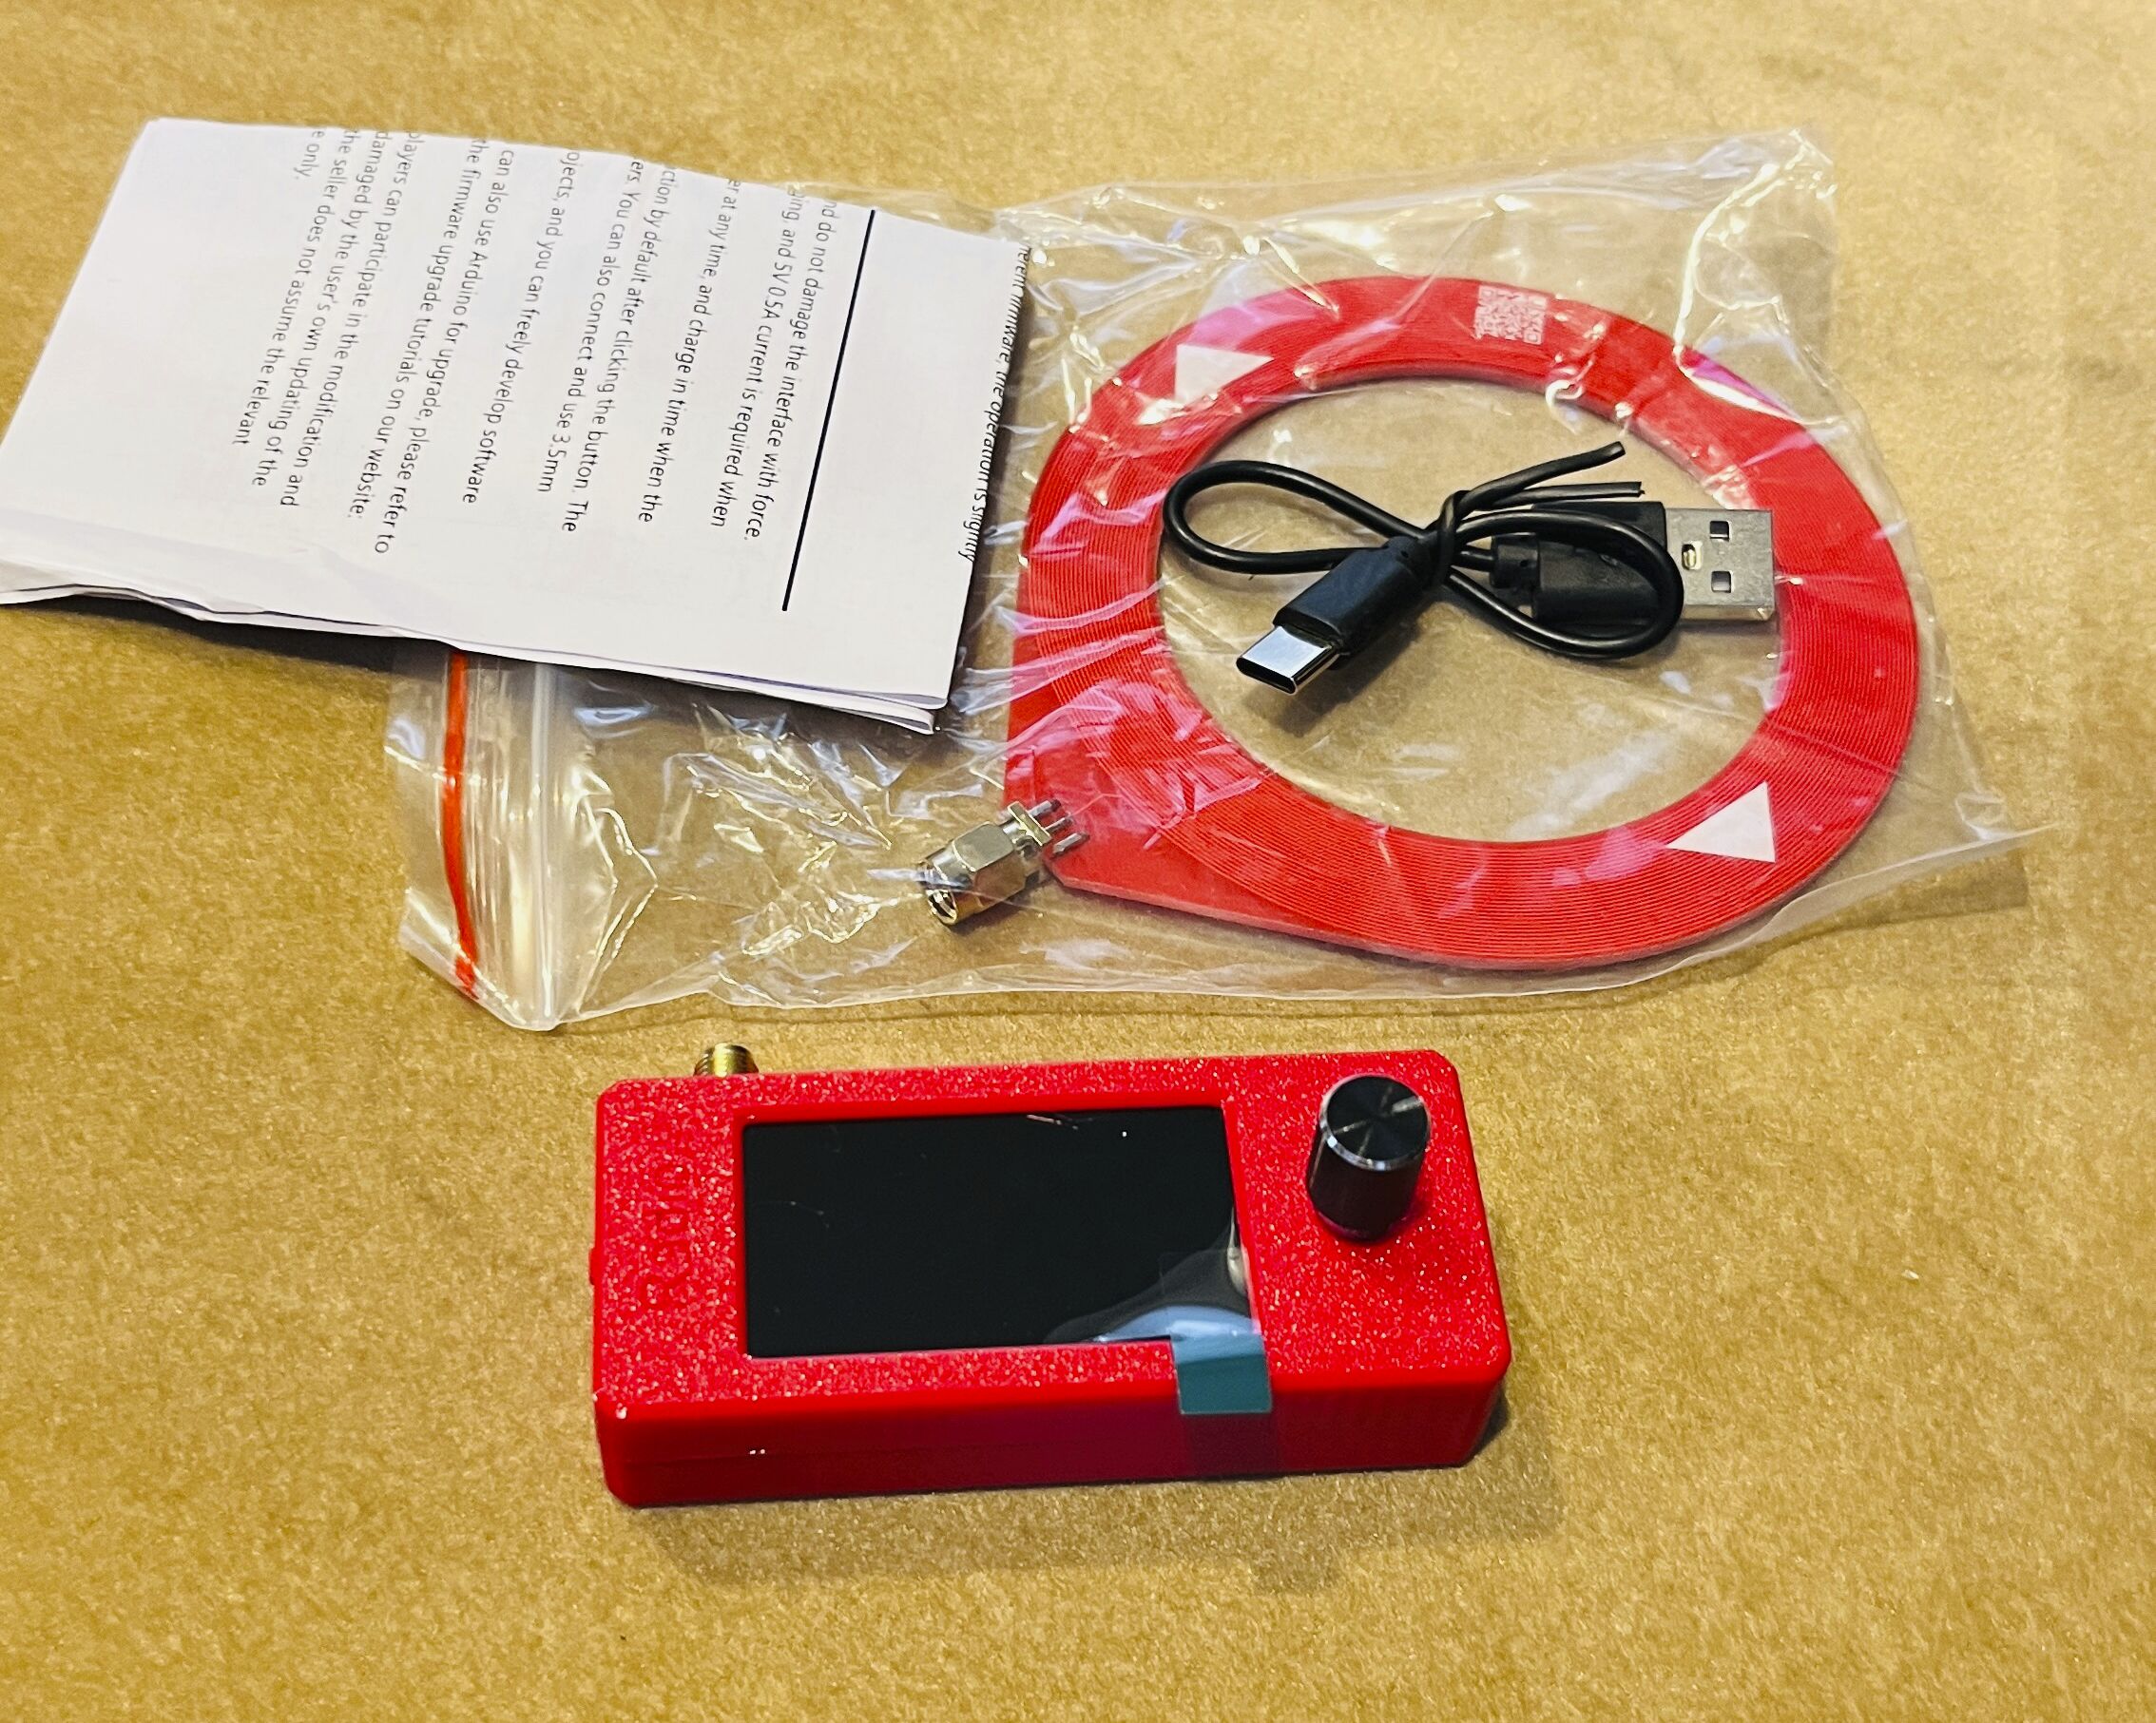
The photo doesn’t carry the idea of how small this is. The radio is about 3 1/4″ wide and the outside diameter of that donut antenna is less than 4″.
The Quick Start Guide says to charge the radio before first use, and I did that. It didn’t take long. There is a red LED on the left side of the bottom of the radio that is on while charging, and goes off when done. There is a tiny switch on the left side of the radio to turn it off and on.
The first order of business was a firmware update. The Quick Start Guide links to a Mini Radio web page with download instructions and links to the firmware.
Which firmware to get? There are the “official” firmware and the G8PTN firmware options (and perhaps others). They are becoming quite different in how the radio display looks and works. I decided to go “official” the first time around. [Spoiler alert: in the end, I kept the G8PTN version.]
The firmware installation is not too weird and the instructions mostly make sense. The only mistake was failing to tell the user to check the boxes next to the firmware files in the Flash utility. They’re correctly checked in the screenshot below. The firmware update will appear to complete without the boxes checked, but nothing changes.
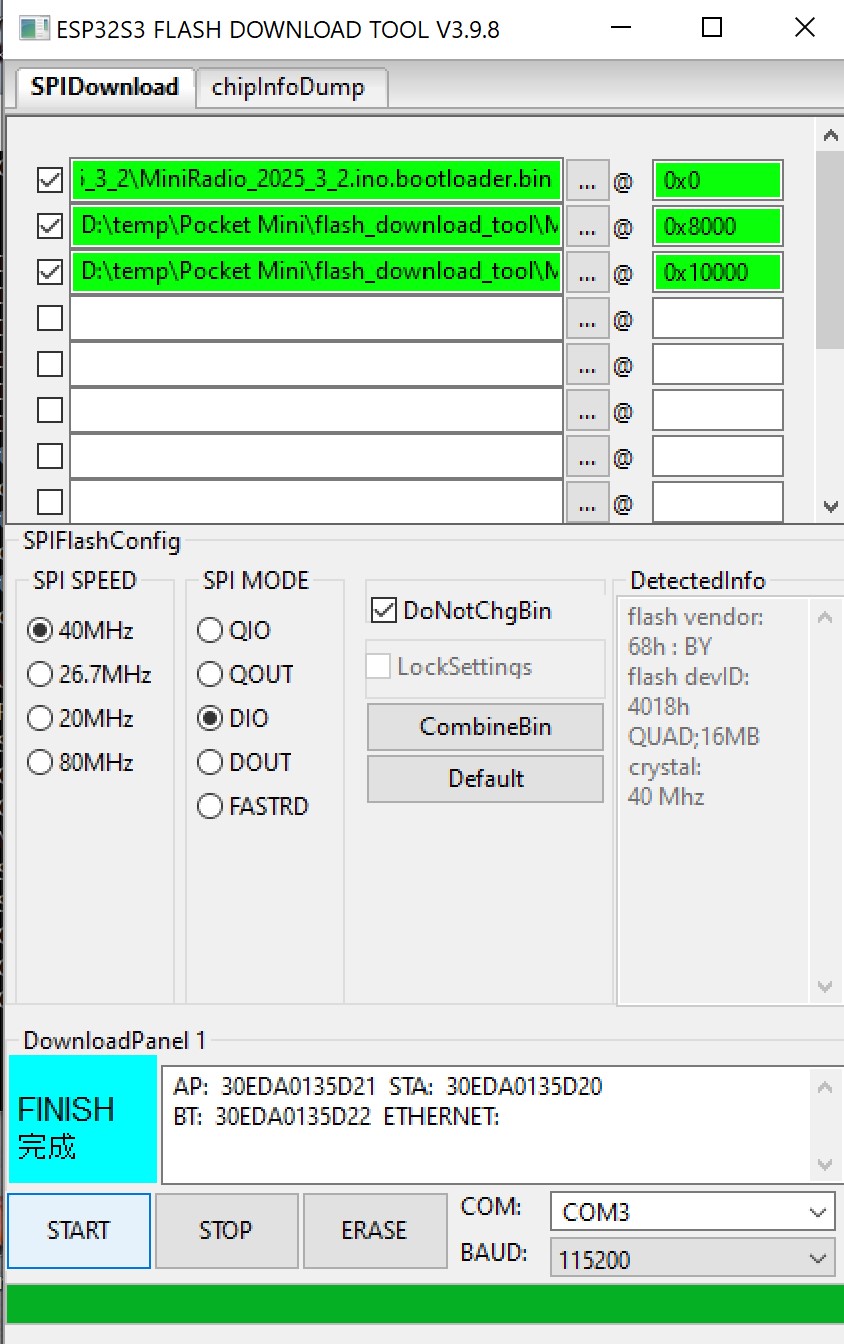
The screen shot shows the completion result. After filling out the three lines pointing to the firmware files, the user should plug in the USB cable to the Windows PC (Version 10 preferably to avoid false detection of malware), turn the radio on and count to ten. Then select the COM port from the drop down box. Then click Start. The blue box on the left will start as Green and say IDLE, then SYNC, then DOWNLOADING and eventually FINISH, indicating you are finished. The radio will go silent in the middle of the procedure. Power the radio off and back on and it should be on the new firmware. My original firmware just started the radio. The new firmware displays an initial screen showing the version before the radio starts.
I actually ended up installing both sets of firmware, but stayed with the official one for now.
The radio is a royal pain to use with the initial software version, but makes a little more sense with the update. The knob can be pressed to select a secondary menu where you can pick options. By default the knob tunes the radio. When clicked once it switches to Volume. A second click brings up a menu and the knob scrolls through that. A click selects from the menu. One selection is Band and under that are VHF (FM) and the lower frequency bands.
The G8PTN firmware significantly changes the screen layout. It supports some sort of calibration procedure. It has a mute function. It also provides for adjusting display brightness, and supports a finer step on shortwave, including reduced chuffing. [I’m convincing myself to change firmware here.]
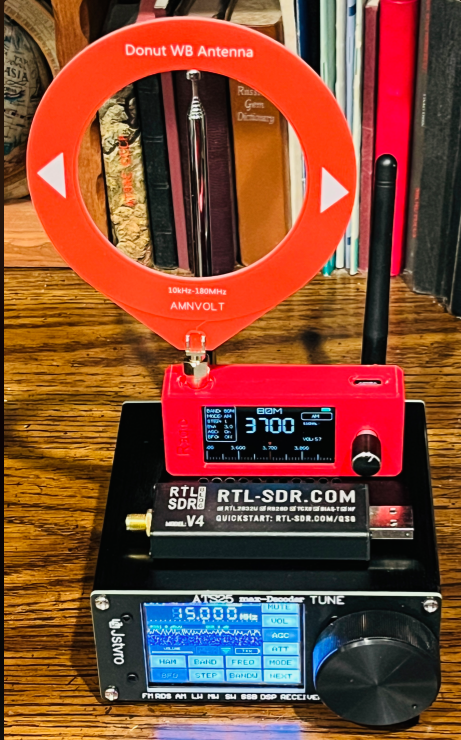
The real first impression is that the radio isn’t very sensitive with the donut antenna. There are several versions of the antenna; mine is marked 10 kHz to 180 MHz. I’ll want to give it a try with the MLA-30+ and the Wire Up a Tree (WUT) antenna.
This is a radio for tinkerers and some users alter the circuitry to match antenna impedance and provide an extra stage of amplification.